Guide to ironing a dress shirt
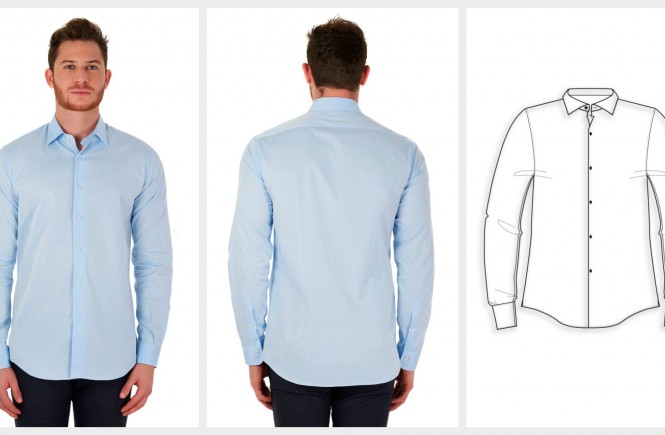
No one actually likes to iron, but there are garments that really must be ironed before being worn. The dress shirt is surely one of them, wearing an expensive, fine shirt is completely worthless if it is full of creases.
So, given that ironing a shirt is compulsory (except for special no iron shirts), it is necessary to learn how to do it properly. Read this guide and practice as much as you can until you became a master of ironing!

Ironing essential tools:
- The iron – Invest in a good quality high-heat iron, whether it’s a travel sized or not. It is also useful to have a steam iron, it will take you half the time and the outcome will be better.
- The board – Do not undervalue the importance of the ironing board, the wrong support is really bad for the posture and it will make the work more difficult and even dangerous. Choose carefully the board that’s confortable to you, the adjustable high boards are the best ones.
- Starch spray: Not necessary but useful, use it on the shirt before ironing.
Get ready:
Prepare the iron board and switch on the iron, put the garments next to you and prepare the hangers for the ironed shirts.
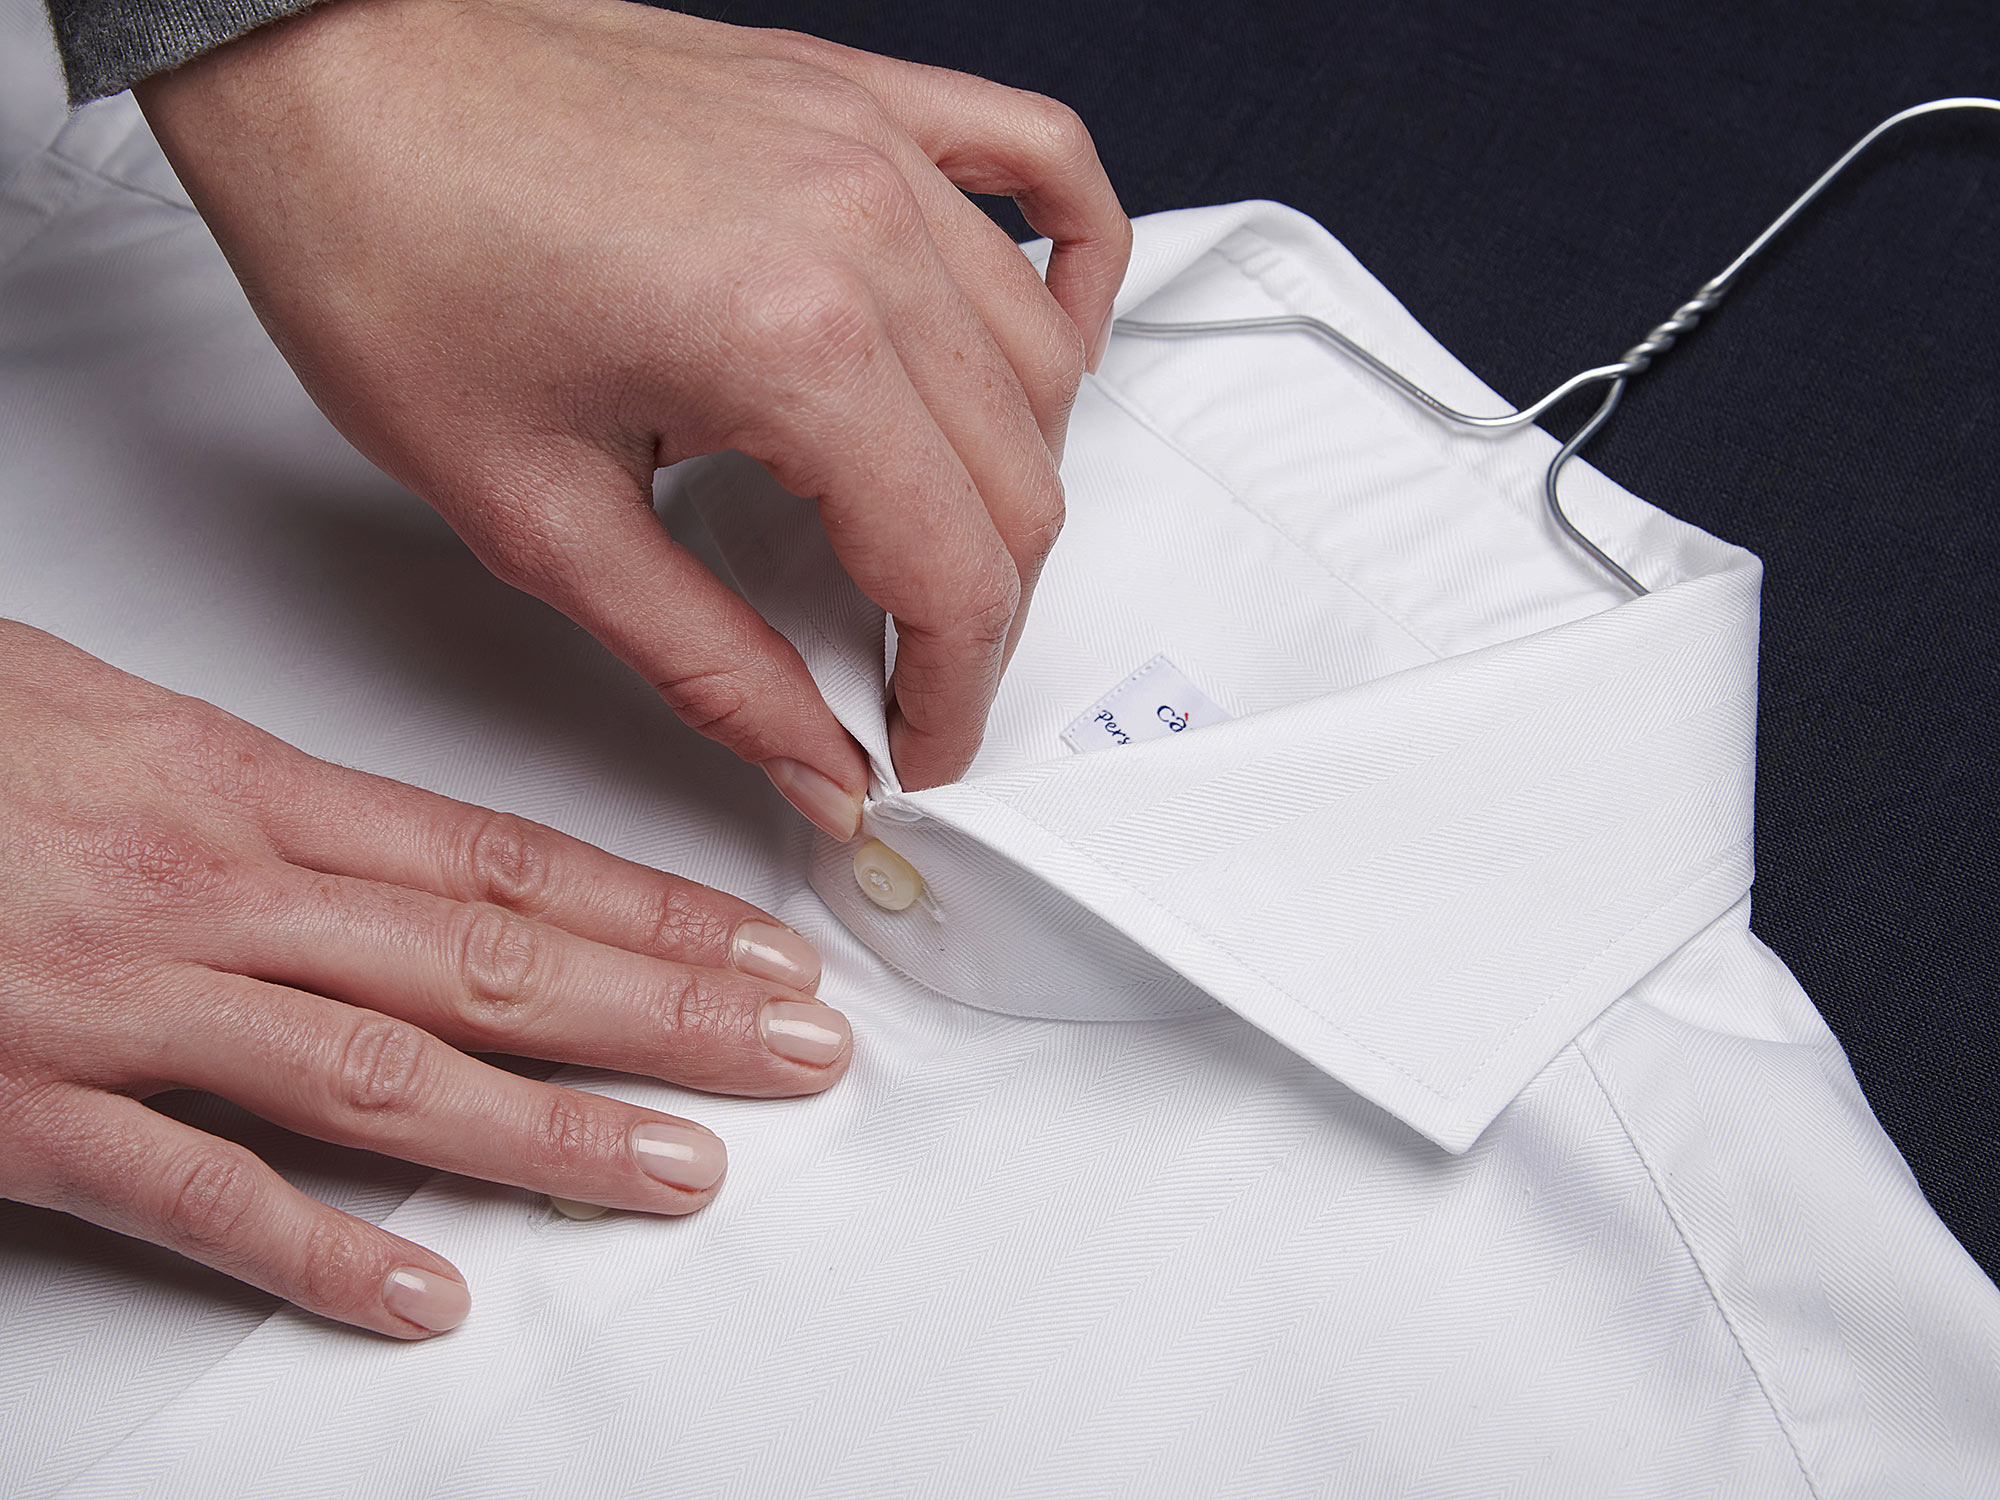
Step #1: The collar
Spread out the collar and iron from one end to the other, then reverse and repeat on the other side.
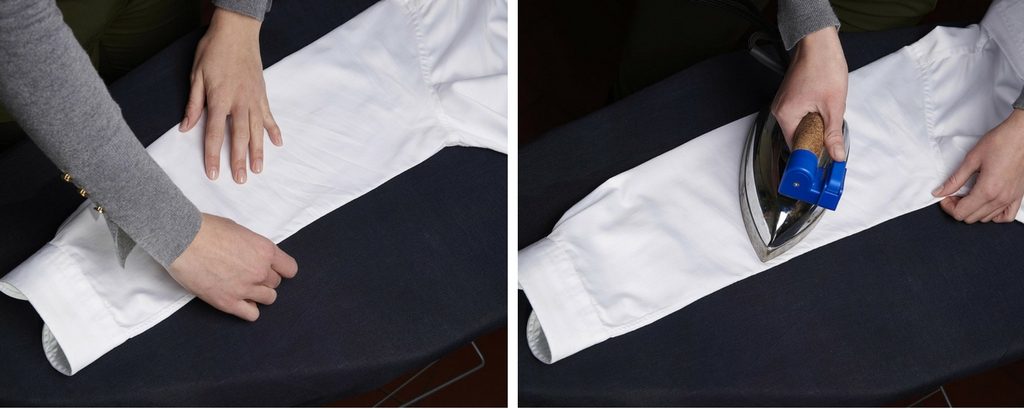
Step #2: The cuffs
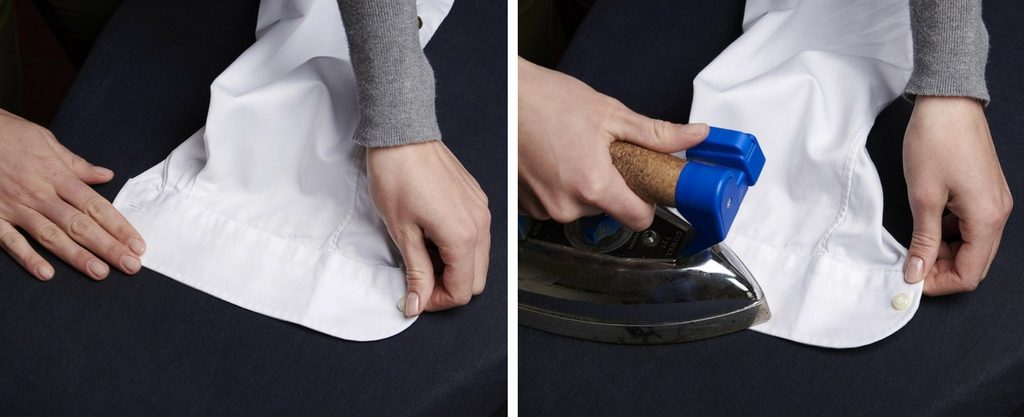
Do the same with both cuffs.
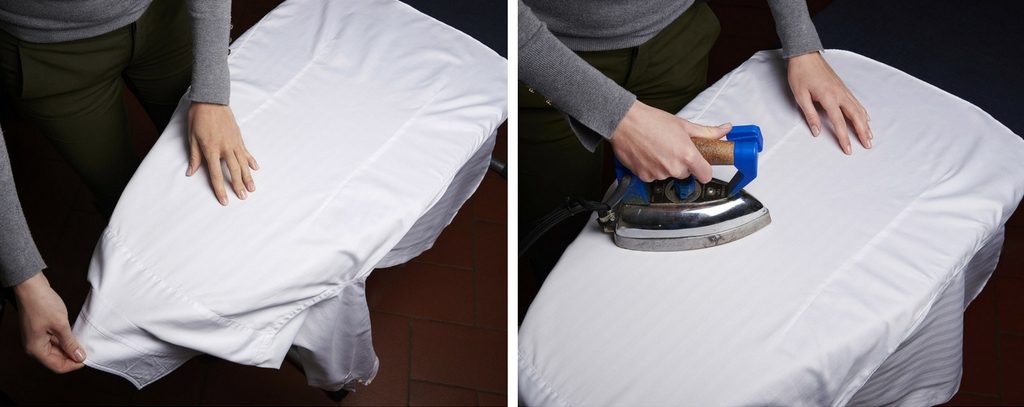
Step #3: The sleeves
Extend one sleeve, carefully remove all creases, then press from the shoulder to the cuff, trying not to iron on the edges. Repeat on the other side, then repeat all on the other sleeve.
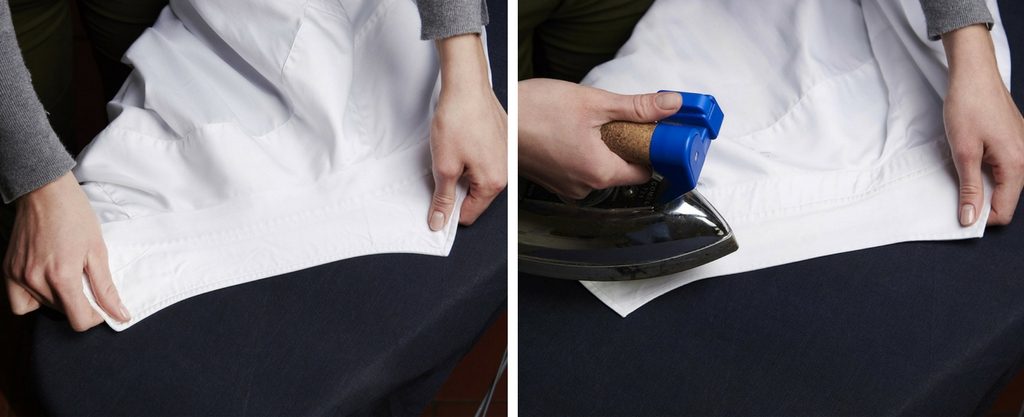
Step #4: The back
Extend the back of the shirt on the board and iron it from the collar to the bottom. If your board isn’t large enough, first iron one half of the back then the other.
Step #5: The front
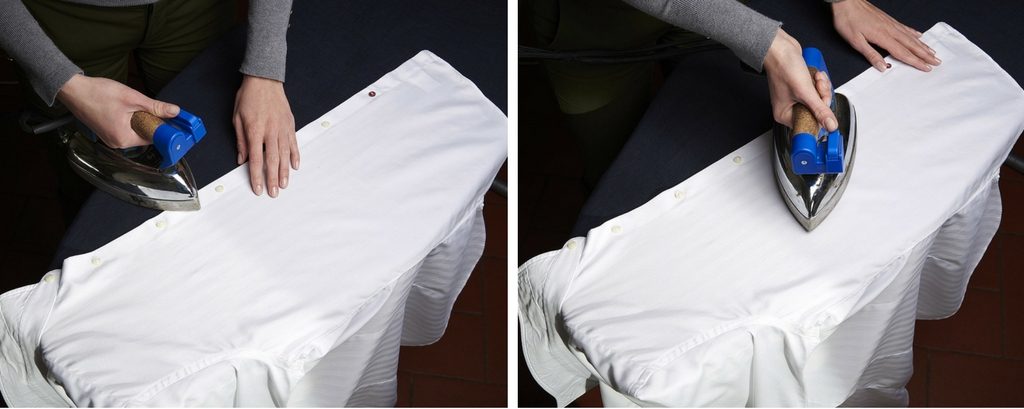
In the end extend the front and iron between the buttons, without pressing on them. Then iron the front body from the bottom to the shoulder. Repeat on the other front half.
The final touch:
After your shirt is ready, carefully lay it on the clothes hanger and close the first button to prevent the collar to get out of shape. That’s it!